




How do you connect AI writing tools to WordPress publishing?: WordPress now powers about 43% of all websites, so this is not some niche setup question.…
Last updated: October 10, 2026
Key Takeaways
- Drafting text only? A no-code workflow is usually enough.
- Three main paths exist: a WordPress plugin, Zapier or Make, or the WordPress REST API.
- Simple text is easy; images, SEO fields, or approvals can change the best choice.
- “Just connect ChatGPT to WordPress” is too vague to guide a real workflow.
WordPress now powers about 43% of all websites, so this is not some niche setup question. The real issue is control: pick an integration path that matches how much control you need, then keep a human step before publish. For a solo blog, that may mean Zapier or Make sending drafts into WordPress as posts. For a higher-volume site, the better route is usually the WordPress REST API, because it gives tighter control over titles, categories, featured images, and draft status. (Source: WordPress.org)
Most people treat “connected” as one thing. It isn’t. A professional should confirm the setup for your site, because you can connect AI to WordPress in at least four different ways, and the right one changes based on whether you need speed, review, formatting, or scale. Skip that decision, and you either build a brittle workflow or hand your site a mess of half-finished posts.
What Actually Determines the Right Connection Method

Need only a text draft? Then a no-code automation is usually enough. Need structured publishing, scheduling, or metadata control? The API-based route is better. That split changes how much can break, and fast. OpenAI’s own usage guidance and WordPress’s REST API documentation both point to this divide between simple drafting and structured publishing. (Sources: WordPress REST API Handbook; OpenAI API docs)
Here is the useful way to think about it:
| Situation | Best Path | Why Other Options Fail |
|---|---|---|
| One-off drafts from ChatGPT or Claude | Copy/paste into WordPress or a browser extension | Full automation is overkill and often slower than manual cleanup |
| Regular posts from prompts, spreadsheets, or forms | Zapier or Make into WordPress drafts | Direct API work takes longer than the problem justifies |
| Multi-step editorial workflow | WordPress REST API plus approval stage | Simple automations can publish the wrong version too early |
| High-volume content pipeline | API, webhooks, and structured fields | No-code tools become hard to maintain at scale |
| Non-technical team editing in WordPress | AI tool inside WordPress or an editor plugin | External automation can hide errors until after import |
If the real need is “I want AI to help me write inside WordPress,” then a plugin may be enough. If the real need is “I want content created elsewhere, then pushed into WordPress as drafts,” then automation tools or the REST API are the better fit. That distinction saves time because setup can range from 10 minutes for a plugin to a few hours for no-code automation and a day or more for custom API work.
The standards matter here too. WordPress has a documented REST API, and that matters because it lets outside tools create or update posts in a predictable way. Before any tool writes to your site, read the official WordPress REST API handbook on developer.wordpress.org and the authentication guidance on WordPress.org. Microsoft also recommends clear human review steps when AI output affects published content. (Sources: WordPress REST API Handbook; WordPress.org Authentication; Microsoft guidance)
A simple rule helps: if convenience matters more than structure, start with no-code. If control matters more than convenience, start with the API. In practice, that often means choosing between a 15-minute setup and a more durable system.
Quick check: if your main question is “How do I get text into WordPress without breaking my workflow?”, this is the section that applies to you.
How do you connect AI writing tools to WordPress?
Three paths do the job: a plugin inside WordPress, an automation platform like Zapier or Make, or the WordPress REST API. Which one fits depends on where the AI output begins — in the browser, in another app, or in a structured system like a spreadsheet or CMS. If your first goal is to publish drafts, not finished posts, keep the workflow simple and let WordPress handle the final step. Zapier and Make both document WordPress actions for creating posts and drafts. (Sources: Zapier WordPress integration; Make WordPress modules)
Path 1: Use a WordPress AI plugin
For the least technical route, install a plugin that adds AI writing directly to the WordPress editor. That keeps drafting inside the site, which is handy if you dislike bouncing between tabs. The feature set changes often, so verify current capabilities before committing; the WordPress plugin directory and plugin docs are the safest place to check current support. (Source: WordPress Plugin Directory)
Use this path if:
- You want to draft titles, outlines, or short sections inside Gutenberg.
- You do not want to manage API keys in another platform.
- You are fine reviewing content manually before publishing.
- You want a lower setup burden than Zapier or custom code.
- You mostly write standard posts, not complex content with custom fields.
The trade-off is control. Plugins are convenient, but they can be limited in prompt handling, source citation, or workflow steps. Some also depend on the plugin’s own service layer, which puts one more vendor between you and your site. That can be fine — until it isn’t.
Path 2: Use Zapier or Make to send drafts into WordPress
Need content created in ChatGPT, Google Docs, Airtable, Notion, or a form, then pushed to WordPress? Zapier or Make is often the quickest route to a working draft workflow. This is the middle ground: more flexible than a plugin, less technical than raw API work.
A practical workflow looks like this:
- Create the prompt or brief in your source app.
- Generate the draft in your AI tool, such as ChatGPT or Claude.
- Send the output to Zapier or Make through a trigger, webhook, or scheduled check.
- Map fields into WordPress: title, slug, excerpt, content, author, categories, tags, and status.
- Save as draft, not publish, so a human can check links, headings, and claims.
- Add a second step for images, featured image, or SEO fields if your stack needs them.
This route works well if your team wants repeatable publishing without writing code. It also works well when the AI tool you prefer does not have a direct WordPress plugin. Zapier and Make both support triggers, webhooks, and scheduled runs, which is enough for many editorial pipelines. (Sources: Zapier WordPress integration; Make WordPress modules)
The limits show up fast when content gets complicated. If your post needs custom taxonomies, advanced custom fields, or exact formatting for blocks, then a no-code mapper can become brittle. One small change in the source text can kick the whole layout sideways.
Path 3: Use the WordPress REST API for full control
For reliable publishing at scale, use the WordPress REST API. It is the cleanest option when posts are generated in another system and pushed programmatically into WordPress. WordPress documents post creation, authentication, and media handling through its REST API, which makes this path easier to standardize. (Source: WordPress REST API Handbook)
Use this path if:
- You need custom fields, categories, tags, and featured images handled in one flow.
- You want drafts saved automatically and published later by a person or another job.
- You have a developer, technical editor, or automation specialist available.
- You are moving content from another platform into WordPress regularly.
- You need better logging and repeatability than a no-code tool gives you.
A standard path is:
- Create structured output from the AI tool, ideally in JSON or a clear template.
- Pass that output to a middleware app, script, or serverless function.
- Authenticate with WordPress using an application password or another approved method.
- POST the content to the WordPress REST API as a draft.
- Validate the post in WordPress, then move it to pending or publish after review.
- Log failures so broken prompts or malformed content do not disappear silently.
This is the path I would choose for a serious publishing process. It is not always the fastest to set up, but it avoids a lot of the hidden trouble that shows up later. WordPress application passwords were added in WordPress 5.6, which gives this approach a clear authentication option without custom login hacks. (Source: WordPress 5.6 dev note)
Quick check: if you are asking “Should I use a plugin, Zapier, or the API?”, the answer is usually plugin for simple in-editor drafting, Zapier or Make for cross-app automation, API for control and scale.
The 3 Conditions That Change Everything

Simple text makes the choice easy; images, SEO fields, or approval steps change it. Three conditions decide almost everything.
1. Do you need drafts or direct publishing?
Direct publishing raises the bar sharply. I would not recommend it for most sites because AI output can miss tone, hallucinate details, or insert weak structure. Save as draft or pending review first. That one setting prevents a lot of damage, and a professional should confirm the review step for legal, medical, financial, or other regulated content. (Source: Google Search Central)
If the answer is “drafts only,” then Zapier, Make, or a plugin is enough for many sites. If the answer is “publish immediately,” then you need stricter validation, stronger prompts, and probably an API workflow with guardrails. In many teams, a draft-first setup cuts rework because one human pass catches the obvious errors.
2. Do you need structured fields?
WordPress setups with ACF, custom post types, schema fields, or multilingual plugins do not play nicely with simple copy/paste. The content may land in the editor, but the page will still be incomplete. In that case, you need a connection that can map data into specific fields, not just dump text into the body.
That is where the REST API or a capable automation platform earns its keep. It can send the title to one field, the excerpt to another, and the featured image to the right place. If you publish on a schedule, structured fields also make it easier to keep dates, authors, and categories consistent across 10, 50, or 500 posts.
3. Do you need human approval?
Legal, medical, financial, or regulated content should not be published by AI without a human gate. That is not a philosophical point; it is a workflow point. A review step matters because the AI can generate fluent nonsense just as easily as usable prose.
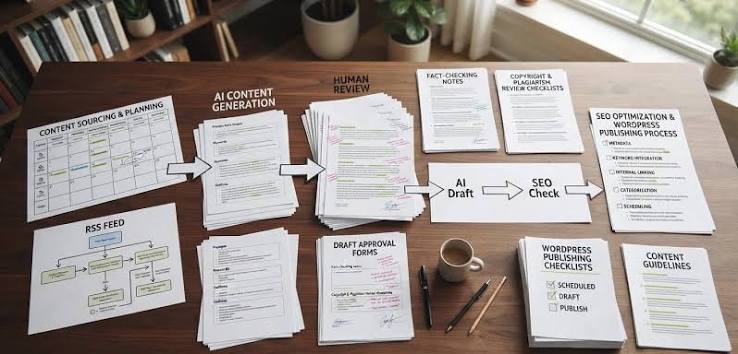
For those kinds of sites, I would keep the AI as a drafter, not an autopublisher. The safer pattern is: AI drafts → human edits → WordPress saves as pending → editor approves. If you are in a regulated niche, check professional standards and legal obligations before you automate anything. Search Central’s guidance on helpful content also favors content that is reviewed for users, not just generated for speed. (Source: Google Search Central)
Quick check: if your site uses custom fields, regulated claims, or direct publishing, your answer is probably “API plus review,” not “quick plugin and done.”
When the Standard Advice Is Wrong
“Just connect ChatGPT to WordPress” sounds tidy, but it is too vague to be useful. Four common situations break the standard setup.
-
Situation: You only write five posts a month.
What changes: Automation can cost more time than it saves.
What to do instead: Keep AI in a separate drafting tool and paste into WordPress manually. A plugin may be enough, but no-code automation can be needless overhead. -
Situation: Your posts need exact block formatting.
What changes: Plain text output often strips block structure.
What to do instead: Generate structured content or HTML, then map it carefully into WordPress. If blocks matter, the REST API is usually safer than copy/paste. -
Situation: Your team edits in multiple stages.
What changes: One-step publish flows create mistakes.
What to do instead: Save AI output as draft, route it to an editor, then publish after a final pass. Tools like Make or Zapier can support multi-step routes better than a simple plugin. -
Situation: You need image generation too.
What changes: Text alone is not the whole job.
What to do instead: Add an image step using a separate source, then send the media into WordPress before or after the post body. WordPress’s media endpoints matter here. -
Situation: Your site is multilingual.
What changes: AI translation and localization are not the same thing.
What to do instead: Treat each language as a separate content object, not a copied post. Translation plugins or a multilingual CMS workflow are usually needed. -
Situation: You want the AI to update old posts.
What changes: Update logic is riskier than new-post creation.
What to do instead: Start with a staging site and a strict rule set for what the AI can touch, such as excerpts, intro paragraphs, or internal summaries only.
The wrong path is usually the one that ignores your site structure. If your workflow has custom fields, approvals, or multilingual content, a generic “connect it with automation” answer will fail the first time the post has to do real work.
Quick check: if your site is small and simple, the advice can stay simple; if your site has structure, start treating AI as one step in a workflow, not the workflow itself.
Step-by-Step: The Safest Setup for Most WordPress Sites
Want the safest all-purpose setup? Use AI to draft elsewhere, send the text into WordPress as a draft, and require a human review before publishing. That is the most practical balance for most sites.
- Pick your AI writing tool: ChatGPT, Claude, Jasper, or another generator that can produce a structured draft.
- Decide the output format before you begin. Plain text works for simple posts; HTML or JSON works better for automation.
- Choose the transfer method: copy/paste for low volume, Zapier or Make for repeatable flows, REST API for control.
- Map the fields you need in WordPress: title, content, excerpt, categories, tags, author, and featured image.
- Set the post status to draft or pending, never direct publish unless the content is low risk and heavily checked.
- Review the imported post in WordPress for broken headings, duplicate lines, bad links, and wrong metadata.
- Only then publish, schedule, or hand it to an editor.
A useful benchmark here is not “how fast can I publish,” but “how many edits does the post need after import?” If it needs heavy cleanup every time, the connection is poorly designed. In that case, tighten the prompt, restructure the output, or move from plugin to API.
One more practical point: if you rely on WordPress block editor formatting, confirm that your chosen path preserves blocks correctly. A tool that strips structure can turn a well-written draft into a formatting headache.
Quick check: if you want the least risky setup, this is the workflow I would pick first.
What I Would Choose, and What It Is Not For
For most small and midsize sites, I would choose Make or Zapier sending AI drafts into WordPress as pending posts, then use the REST API only when structure becomes a real problem. That gives a good mix of speed and control without forcing code on day one.
It is not for every site. I would not use a plugin-only setup for a publication with strict editorial steps, and I would not use direct AI-to-publish for regulated or reputation-sensitive content. I would also avoid a custom API build for a five-post-per-month blog, because the maintenance burden often outweighs the benefit. In other words, choose the simplest path that still protects your workflow.
Drafted with AI; not yet reviewed by a person.